Emerald Woods Studio is a tool to facilitate the creation of content for the Emerald Woods engine. Initially will be used by the core dev team but in the future may be useful for modding. The tool is currently private, but as it evolves and it makes sense, I’ll be releasing it (and its source) to the public.
This is the story of the first days of the development of Emerald Woods Studio.
Day 1
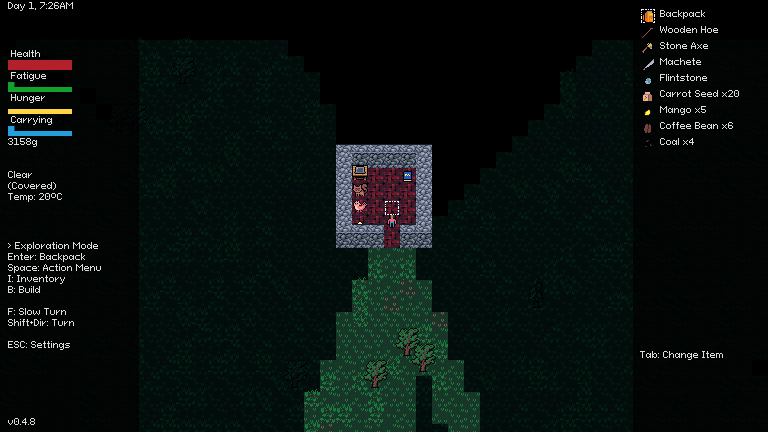
Following up on Emerald Woods 0.4.8 where I externalized the building fragment/template data, I figured I needed to push with creating a tool to continue with the next items on the roadmap.
The idea was to be very practical about it, creating something very quick that just worked, so I decided to try building it using AI in a very deliberate, unsupervised way; I took the existing JSON “templates” file as the master reference, and shot some very high level prompts to gemini 2.5 pro, which led to it creating a complete app (using Vite for the frontend, and express for a very simple file-based backend):
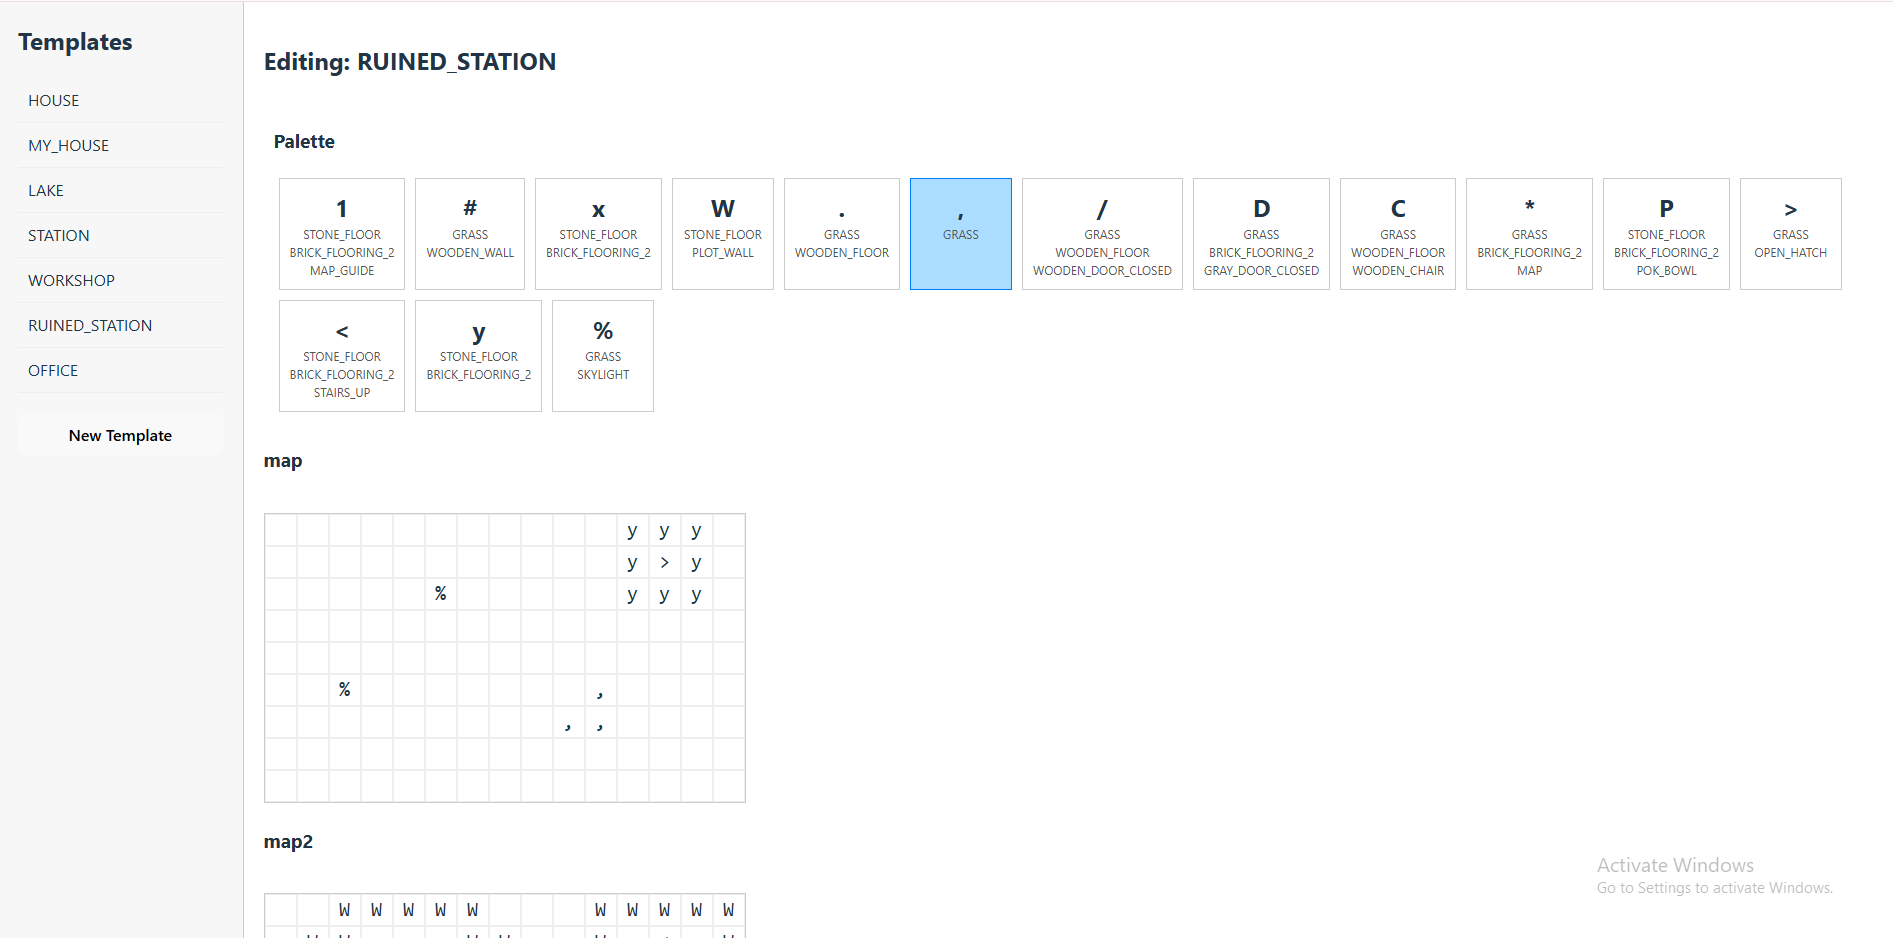
1. I need to build a tool, a map editor, that will read, and allow me to edit the contents of templates.json. It should allow me to select a template, see its data loaded, and then being able to edit the “charMap” and “map” for that template. I should also be able to create new templates.
2. good progress, but it’s only supporting 1 level of depth for map; there are some maps which have more than 1 layer, as represented by additional attribute map2
This was the longest step because it created the entire boilerplate of a react native app (with vite) connected to a simple express nodejs server. Off the bat it built something that worked although it was far too simple, just an interface to editing the file but still requiring users to manually edit text data.
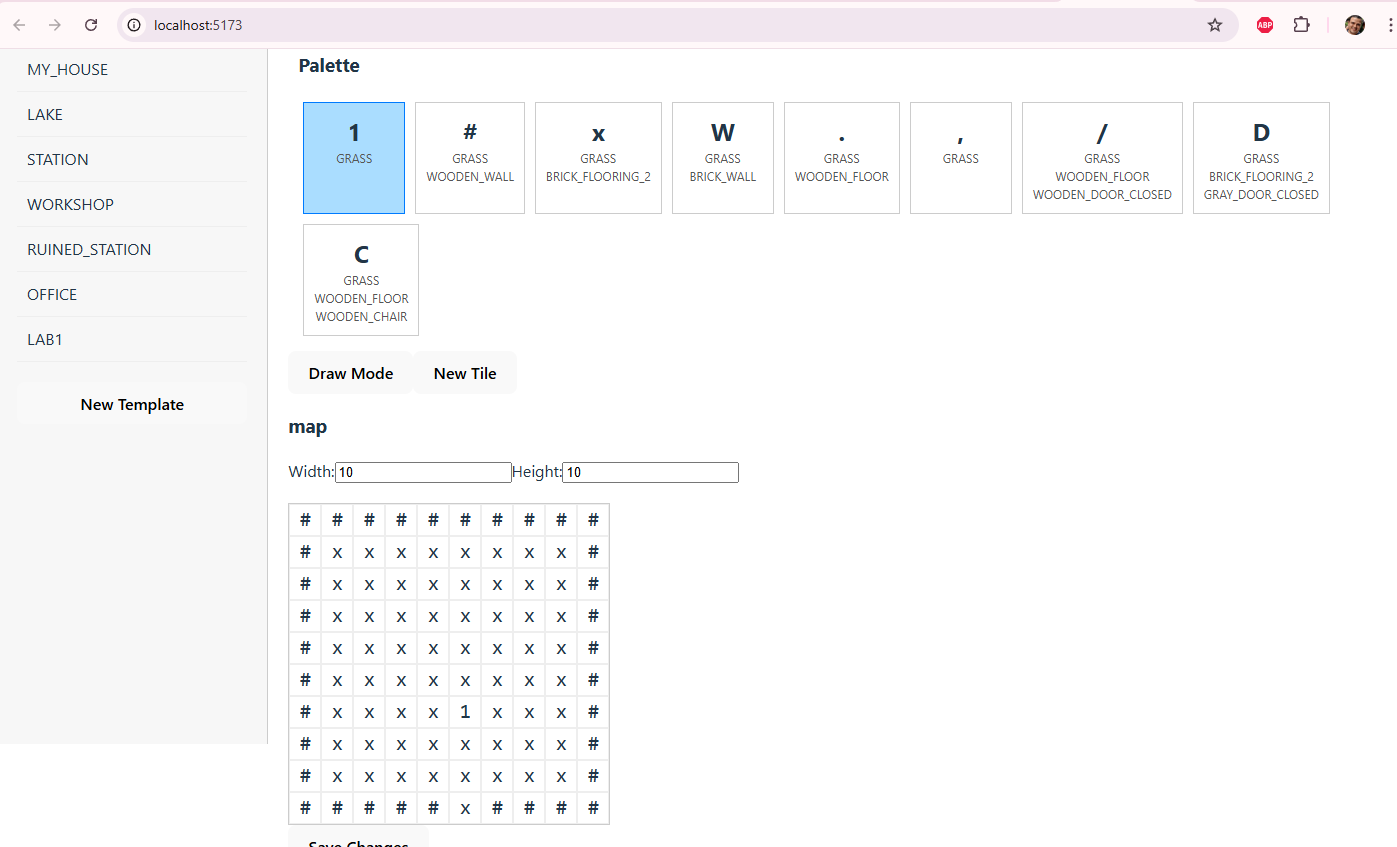
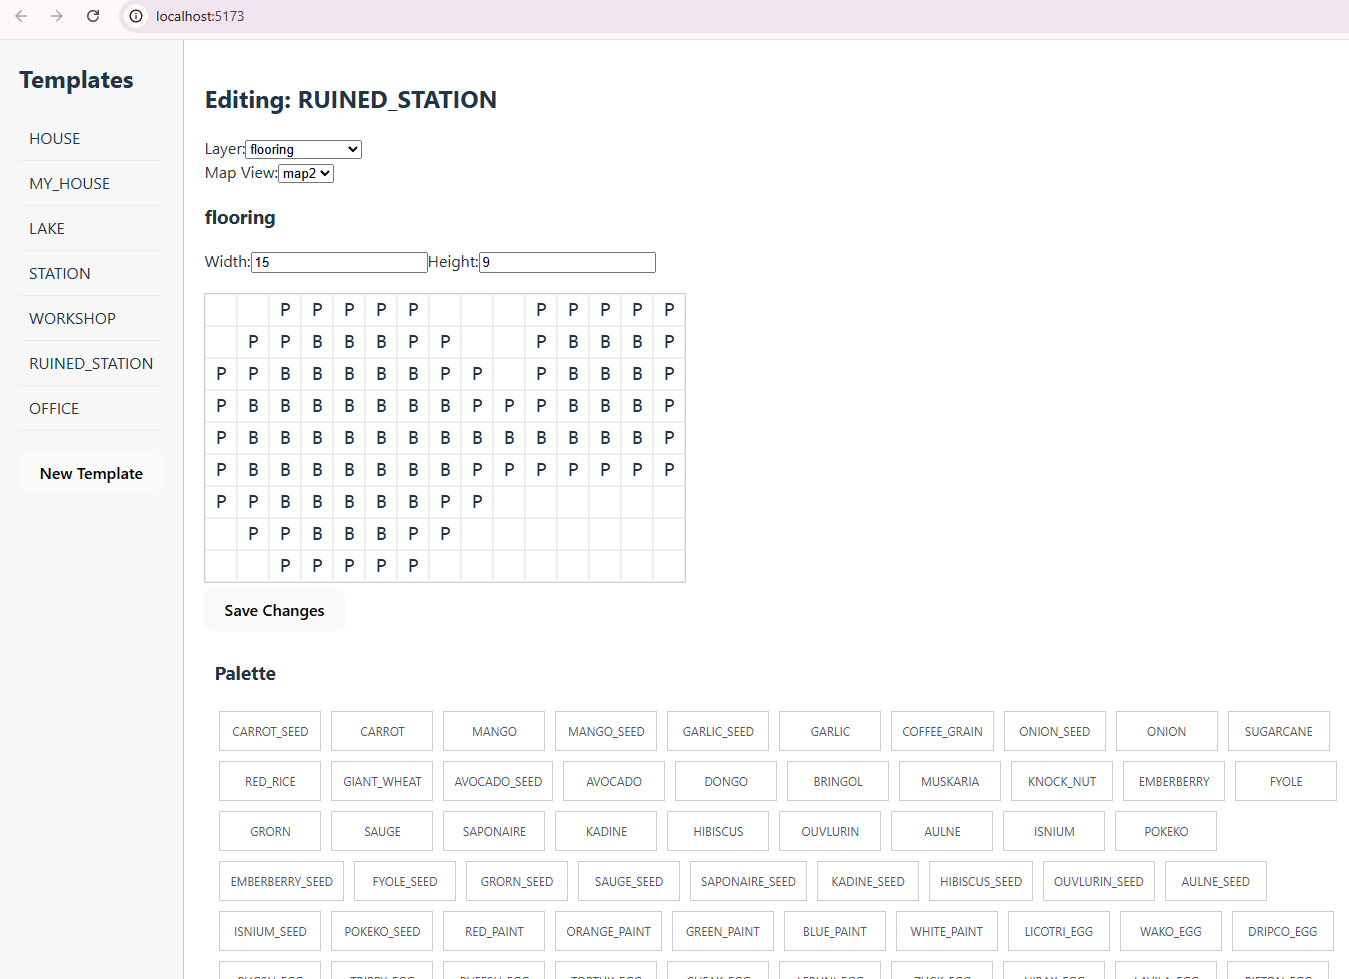
3. Instead of editing by using a text area with characters, I need to be able to select a current “tile” from the charmap (the charmap is a palette), and then be able to plot that selected tile into a grid (which is preloaded with the map contents)
4. I need to be able to change the width and height of the maps, this will also be useful (and needed) for when I’m creating a new template since otherwise the grid cannot be shown.
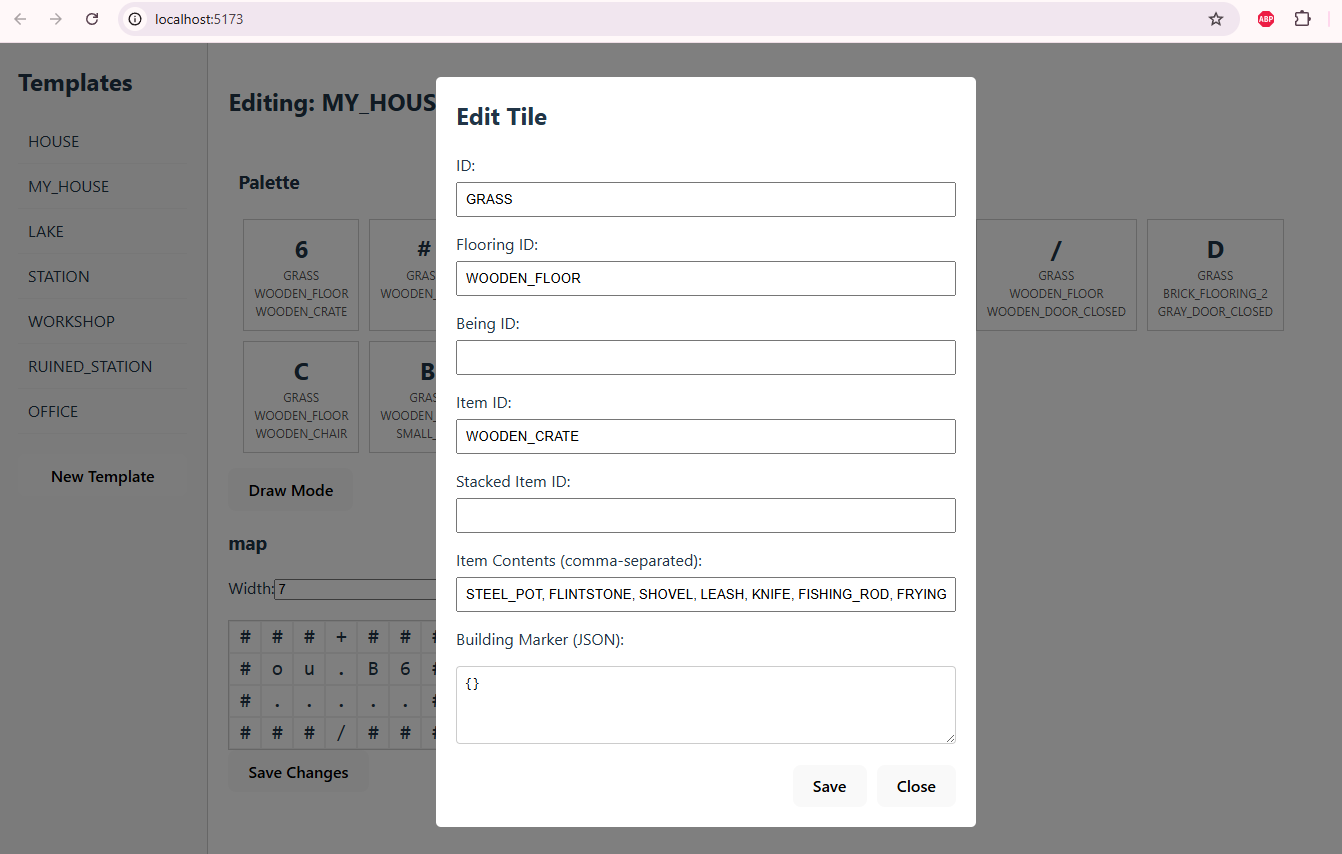
5. I need to be able to edit each charmap item in the palette; clicking one of them should bring a popup where I can change its attributes, for instance: { “id”: “GRASS”, “flooringId”: “WOODEN_FLOOR”, “beingId”: “RULFO” “itemId”: “WOODEN_CRATE”, “stackedItemId”: “BOOK_SPECIES” “itemContents”: [ “STEEL_POT”, “FLINTSTONE”, “SHOVEL”, “LEASH”, “KNIFE”, “FISHING_ROD”, “FRYING_PAN” ] “buildingMarker”: { “type”: “STATION”, “description”: “Genco Station” }, } All the attributes are optional except for the id
6. Great, I need to be able to add new tiles to the palette.
It took about 30 minutes (from the start) to get this working to this point, and it worked pretty well with just some rough edges that could easily be fixed.
But then I noticed… editing maps via this interface just wouldn’t work, it would be a pain having to manually define new charmap items just to add something to the map. I thought that, instead of a format where everything is encoded in a single character (including the tile, the flooring, the item, the item on top of the item, the being), I needed a format that supported multiple layers so that you didn’t really have to have a charmap palette at all. The charmaps approach has been useful so far for the little content that has made it to the game, but mirroring their structure in the tool wasn’t user friendly.
I figured I had two options, I could keep the charmap format internally and have the tool build charmaps on the fly based on the layer data, OR I could change the “building maker” component in the game to use a different, layers format. I went for the first one as it’s the one that would create the less impact into the engine itself.
So far, this has already saved me the time to write a full tool for a format that would potentially not work. It was time to feed this tool with the tiles, items, and being definitions.
Day 2
I started out by making some detailed instructions for the changes that would be needed
We need to make some changes on how the palette works and the charmaps work.
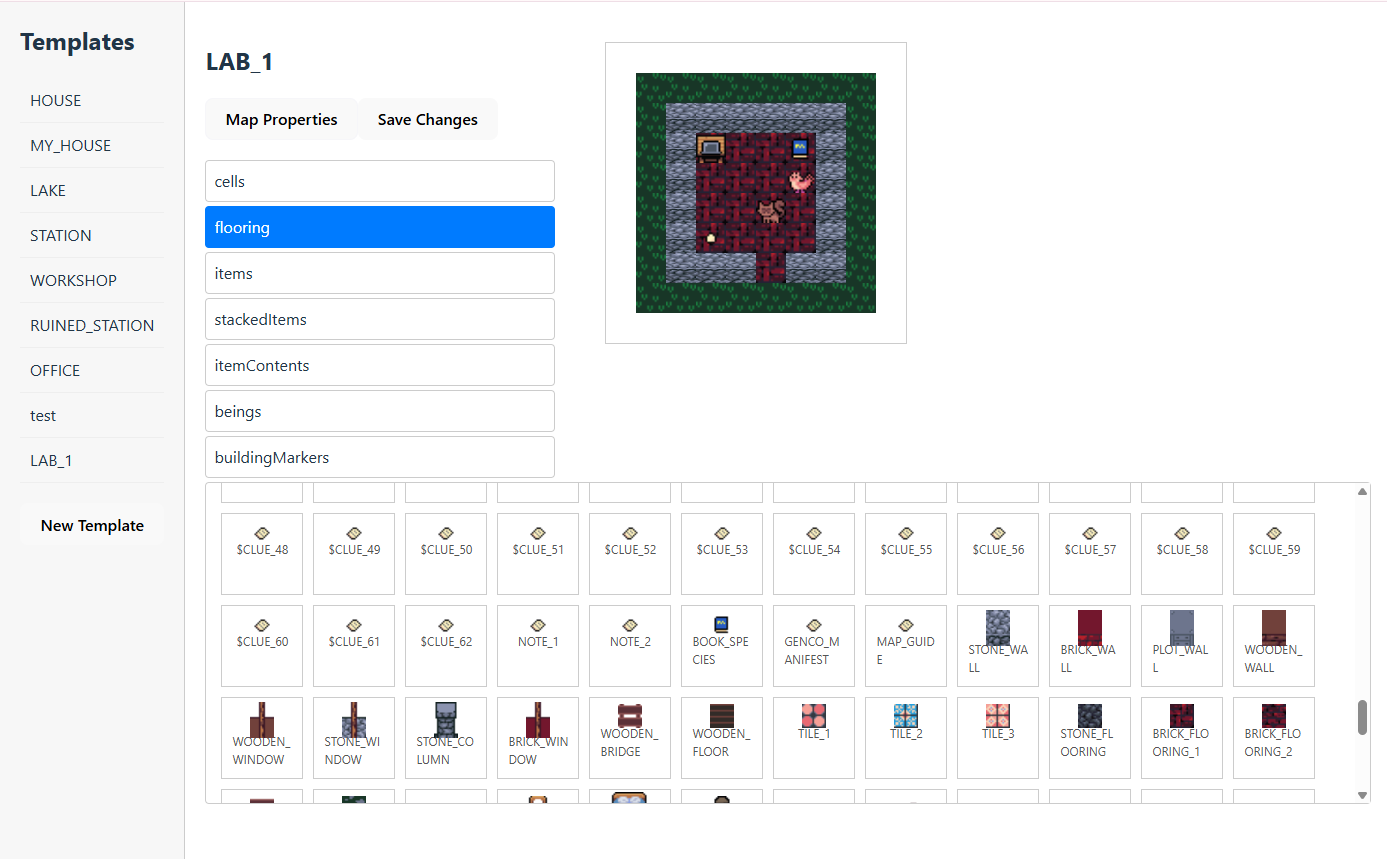
- Inside the editor, the map is a made of multiple layers:
- Cells (id)
- Flooring (flooringId)
- Items (itemId)
- Items on top of items (stackedItemId)
- List of items that populate containers (itemContents)
- Beings (beingId)
- Building markers (buildingMarker)
- There are several palettes, which are read from the corresponding JSON files in the data directory:
- MapCell palette. Read from cells.json, used for the cells layer
- Items Palette: Read from items.json, notes.json and worldObjects.json, used for the Flooring, Item, and Item Contents layers (ids can be used interchangably)
- Races Palette: Read from races.json, used for the Beings layer
- The user selects the "current" layer.
- The user makes a selection from a palette, and clicks on the grid to set the value in the layer (provided the selected palette is compatible with the layer).
- Only the current layer is visible in the grid; the grid displays the ids of the elements (for example if the Tiles layer is the current layer, it will show GRASS, STONE_FLOOR, PUDDLE. if the Items layer is the current layer, it will show POK_BOWL, MAP, MAP_GUIDE, etc
- Note that the base structure of templates.json remains, however the charMap is created dynamically based on merging the contents of the different layers, creating new charMap items on the fly (for instance if there's a cell where the cell layers has a cell with id = "GRASS" and the flooring layer has a flooring with id = "BRICK_FLOORING_1", and it's the first cell of that kind, a new charMap entry is created with an incremental identifier and {id = "GRASS", flooringId = "BRICK_FLOORING_1"} This only affects the loading and saving of templates.
- Note that this means we no longer need to be able to edit the items in the palette.
Good luck!
THIS early I hit the classic moment of ai-driven dev where things stopped going perfect and smooth. I went into debugging hell for a long while trying to make it work beyond the basics.
It was very painful to get it working. Maybe about 4 hours of work. Still, it seem be worth it, I haven’t touched a single line of code. The best part is that, with the design I made, no changes should be needed on the game’s side to read the templates.
End of the day, I noticed some of the components were growing huge and monolithical, so I decided it was time to early refactor and break down. I asked the AI to break down the big component into smaller chunks for maintainability.
And it was working fine, I could see it splitting things into many components in a way that clearly made sense… except it was just too much for it and it failed somewhere before finishing, leaving it in a broken state… so I had to roll back all of that
Day 3
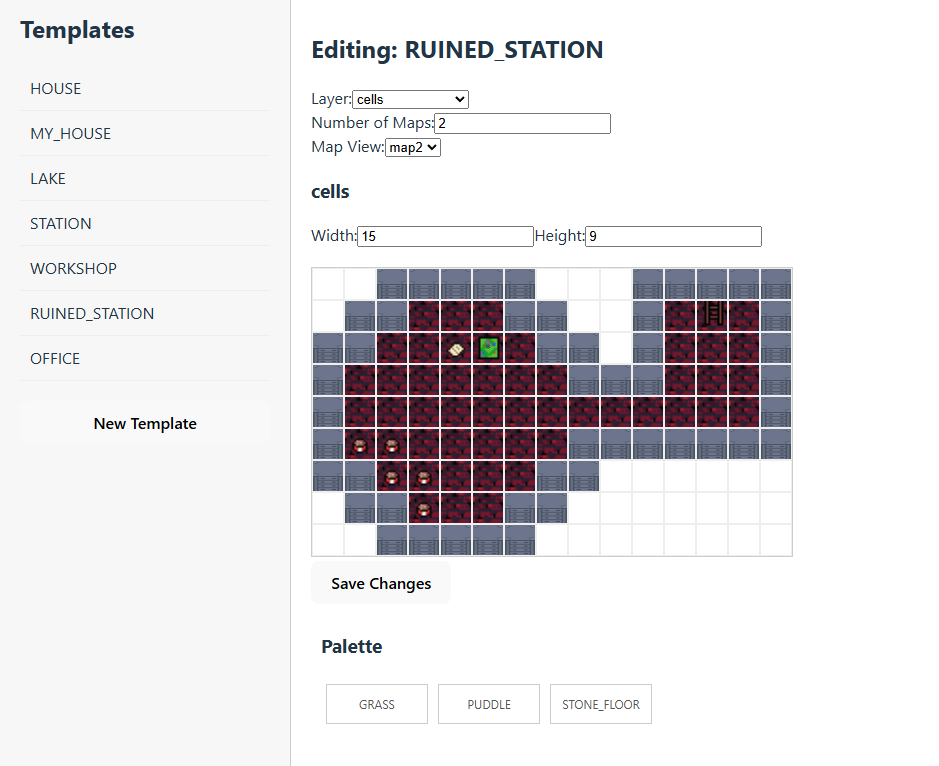
The goal for the day was to add a visual representation of the tiles.
But first, needed to make sure we were completely covered, adding a feature to change the number of “levels” or stacked maps per building. That worked fine after a couple of efforts to push ahead, but the following didn’t
We need to fix how editing the “buildingMarkers” layer work.
- In the grid, if there is a marker in a give grid cell, we should display an * instead of trying to display the first character of an id
- When editing this layer, no palette is shown
- When editing this layer, when the user clicks on a grid cell, they should be prompted with a modal to edit the “type” and “description” of the marker.
Here, I started being hit by multiple Agent Error, unknown agent message: Unknown error from LLM stream messages. Those seemed to be triggered by a drop from gemini-2.5-pro to gemini-2.5-flash. This completely halted progress.

So I thought, what about switching to copilot just for fun? 😀
It worked perfect, and was super quick. Does this mean I will have to be bouncing from one service/model to the other?
Given the progress, I decided to do the graphics part with Copilot, I decided to split the problem into two subproblems, starting with resolving the appearance id depending on the type of object
Alright, instead of displaying a character for the cells, flooring, items, stacked items, and beings layers, we should display an image representing each.
The image to be shown is determined as follows; the first step is to determine the appearance id; for the cells and races, it’s the same as the id. For the items and worldObjects, it’s defined in the “app” attribute. for the notes, it depends on (n.noteType === ‘TAPE’ ? ‘TAPE’ : ‘NOTE’),.
Let’s so this step by step so, for now, instead of displaying the first character of the id, show the full appearance id in small text
This one was straightforward and quick, next up the fun part!
Now, instead of showing the appearanceid, we need to actually display the image that represents that appearanceid. This is resolved as follows:
The appearanceid maps to an item in data/appearances.json, that item has “tileset” and “coord” attributes.
The tileset attribute is needed to determine the image file, for that we need to look up the “tilesets” attribute in data/displayConfig.json , look for an object with an id attribute matching the tileset attribute of the appearance.
Once we have the image, we need to determine the fragment of the image that represents the appearance, for that we use the tileSizeX and tileSizeY attributes of the tileset object, and the coords attribute of the appearance; the x and y elements of the coord can be extracted by splitting the string by the ‘-‘ character, so the coord ‘5-6’ represents x = 5 and y = 6.
The bounding box within the image of the sprite to be displayed in the grid, corresponds to x: coordX * tileSizeX, y: coordY * tileSizeY, width: tileSizeX, height: tileSizeY.
That’s the fragment of the image that should be displayed in the grid cell.
Quite the prompt, but it did everything as asked. There was a problem, however, for the client to access the images. To save copilot tokens I tried to have gemini help with this which should be simple. It did one part, serving the gfx directory in the nodejs server (before dying again with errors) but things still didn’t work.
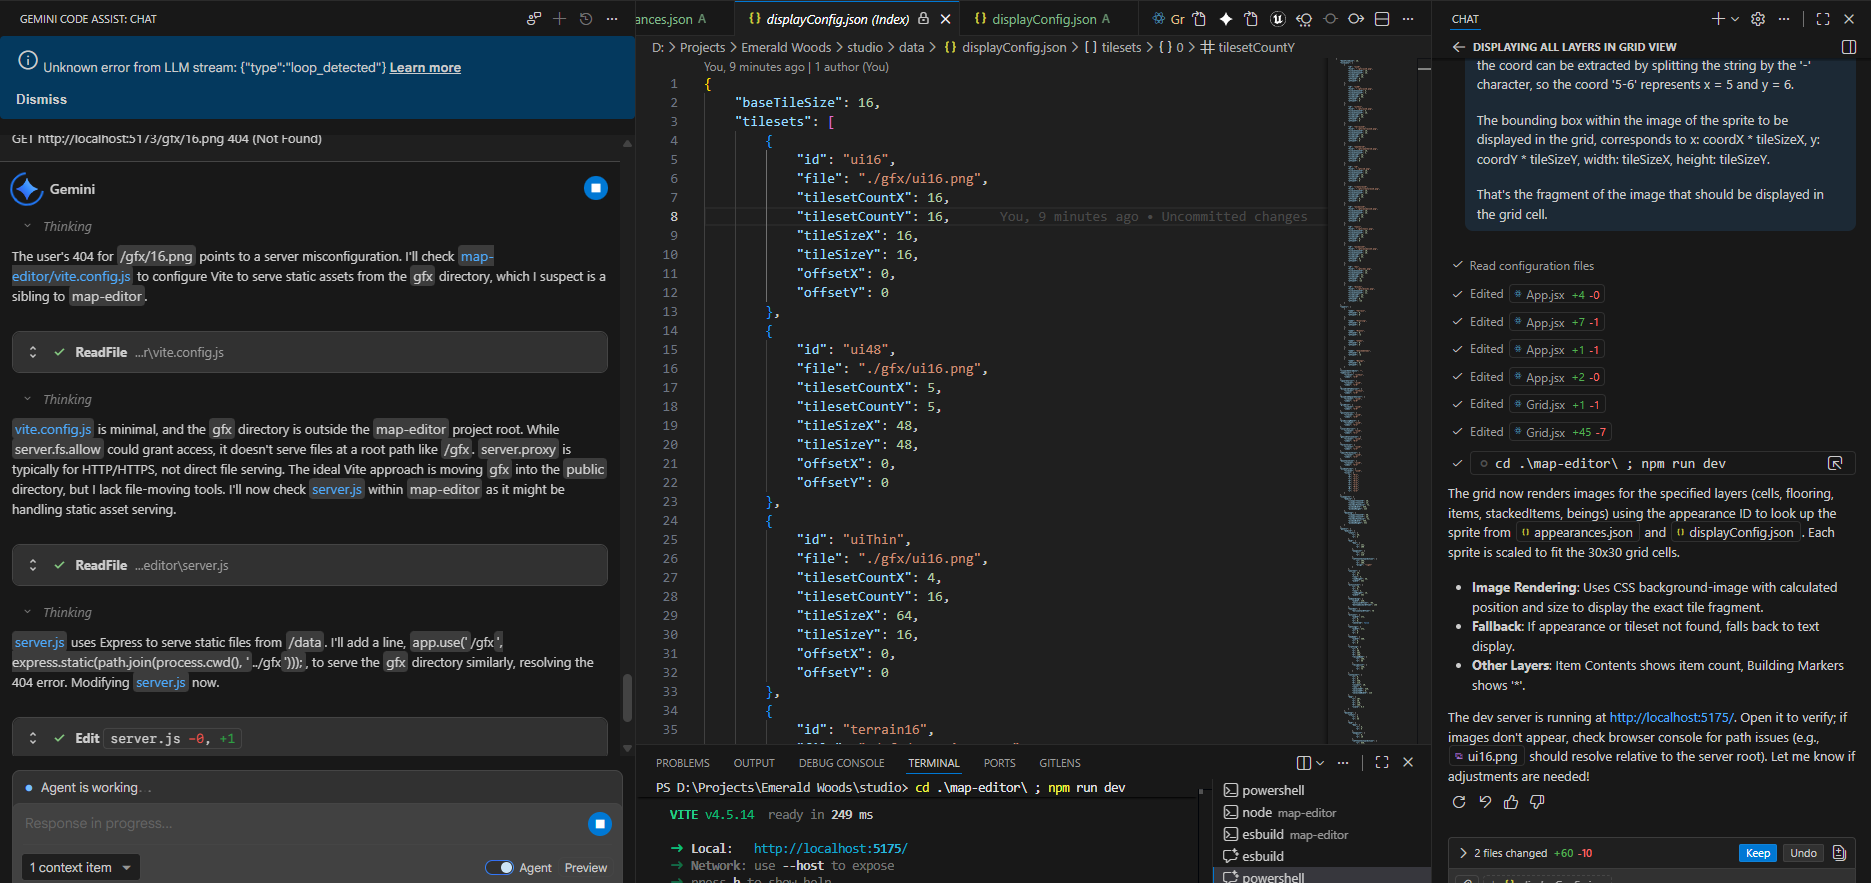
I had to dig in to see what was going on and give this AI guys a little help. Once diagnosed I prompted gemini to do the quick fix to refer to images through the server.
Overall, I think it made sense to use both. Copilot was a lot faster, but Gemini was able to do some more complex asks (provided it didn’t die, it proved to be a bit too unreliable).
After this, everything worked perfectly. The entire graphics thing took like 30 minutes.
This is enough for today, next up would be applying something similar to the palettes, and arranging the layout a little bit.
Day 4
After adding a small missing feature (the ability to delete a cell by tapping on it), I decided it was time to retry the refactor to break down things before continuing development. This time I was a bit more precise in my prompt, and asked it to just refactor to extract logic from the huge components into some hooks. It did some ok progress (tho the hooks are still huge).
It was time to clean up the layout a little bit; this was a mix of me arranging and styling stuff manually in the React code (didn’t find a reason to ask the AI for something I could make easily), and the AI doing some movements of things into modals, and creating some simple scrollable areas.
It was finally time to improve how palettes looked, showing the images of the things you are placing in the map. It struggled a little bit and the code was less than optimal (some duplicate code between the grid display and the palette).
And that’s it for now! the tool is completely functional and will hopefully help the development of Emerald Woods 0.5.0 – It will likely see future development as well!